How to Schedule an Email in Outlook? 4 Easy Steps
(Note: This guide on how to schedule an email in Outlook is suitable for Outlook 2013 and later versions including Office 365)
Email scheduling has become an increasingly important part of our day to day work. It helps us manage our workflow, alert people on time, and increase the mail’s open rate. Although it looks simple, we find many people struggling with it, especially when using Outlook.
That is why I have made this quick guide to show you how to schedule an email in Outlook, the easy way. After this, scheduling emails in Outlook will become a breeze.
You’ll learn:
- How to Schedule an Email in Outlook App?
- How to Schedule an Email in Outlook Web?
- How to Delay all Emails in Outlook?
How to Schedule an Email in Outlook App?
To schedule an email at a preset time follow these steps:
- Open the Outlook app and compose your mail as usual.
- Click on the More Options button (denoted by a small arrow) from the Tags group. If you cannot find this, go to the Options tab and click on Delay Delivery.


- Set your Delivery Date and Time in the Do Not Deliver Before checkbox. You can find it in the Delivery Options section.
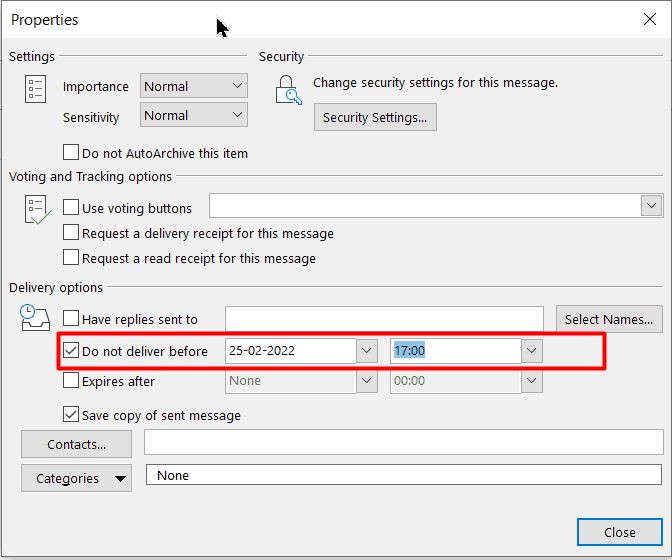

- Close the window and send your message as usual.
Congratulations! You have successfully scheduled your e-mail delivery using Outlook. Please note that the scheduled e-mail will remain in your outbox until the set time.
Meanwhile, you can come back any time and modify the e-mail if needed.
In case, you decide to send it immediately, repeat steps 1 to 2 and clear the Do Not Deliver Before checkbox.
How to Schedule an Email in Outlook Web?
If for some reason, you are using the web version of Outlook and need to schedule your emails, follow these steps.
- Visit Outlook and login into your account.
- Compose your new email as usual.
- Click on the Arrow icon next to the Send button and click on the Send Later option.
- Select any preset time or click on Customised Time to set a custom time.
- Click Send.
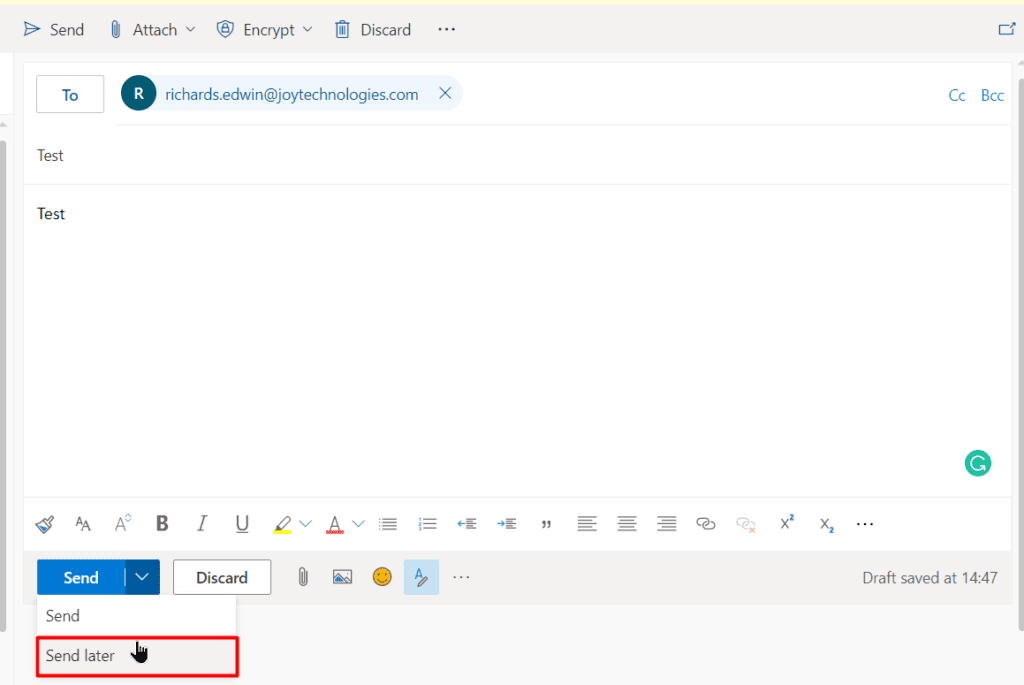

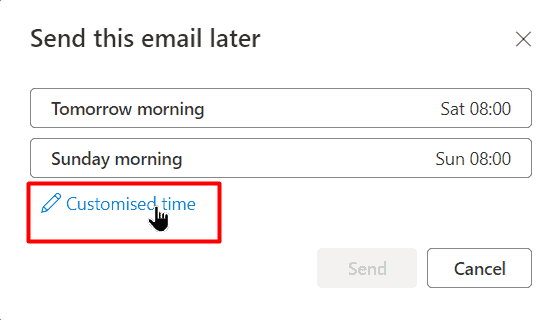


This will schedule your mail to be sent on this set date and time. You can find all your scheduled emails in the draft section.
How to Delay all Emails in Outlook?
Sometimes, you may want to delay the delivery of all e-mails by a standard prest time.
If that is the case, follow these steps:
- Open Outlook and go to the File tab and open the Manage Rules & Alerts section.


- Click on the New Rule button.
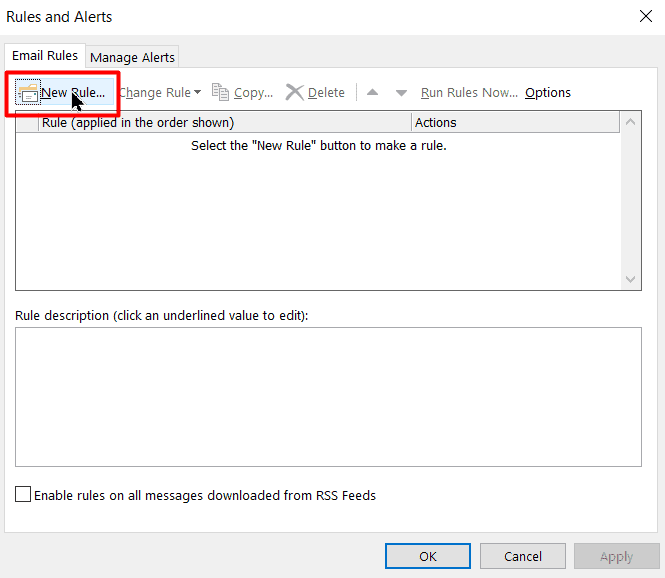

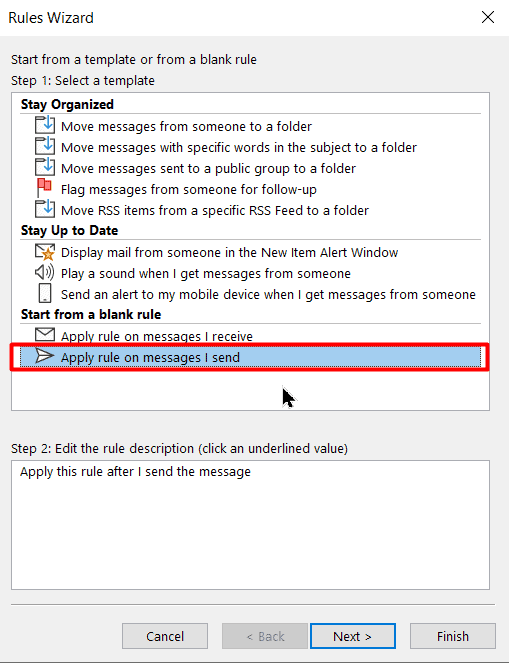
- Now, click the Apply Rule on Messages I Send option under the Start from a Blank Rule section. Click Next.

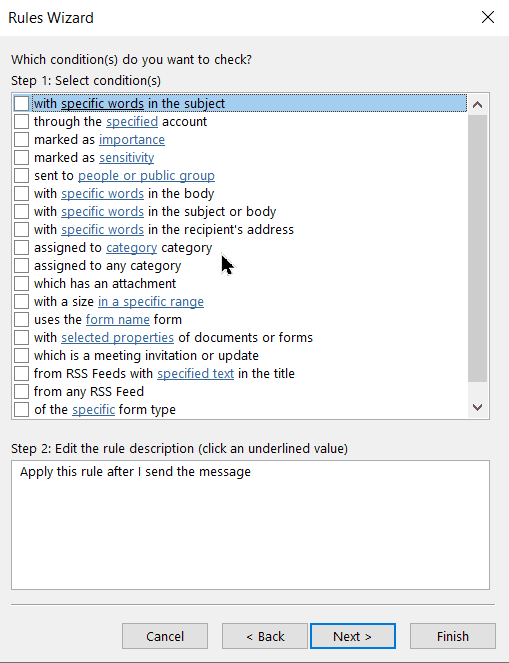
- You can now set conditions using the Select Conditions list, as per your requirements. If you don’t set any conditions, this rule will be applied to all your mails by default. Click Next.


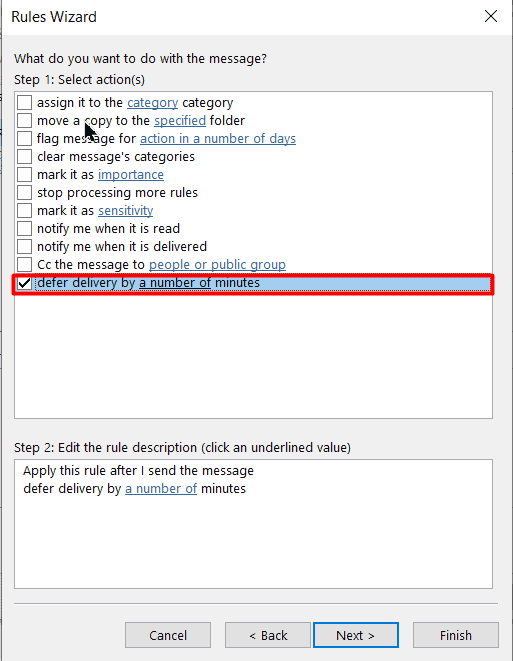
- Next, check the Defer Delivery by a Number of Minutes option in the Select Actions list.

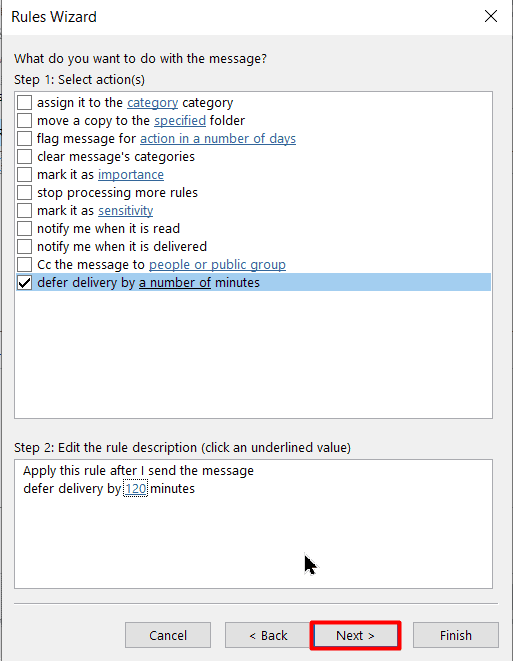
- Choose the ‘A number of’ option in the Edit the Rule Description box.


- Enter the number of minutes by which you want your mails to be delayed. It has a maximum limit of 120 minutes.


- Click OK. Confirm by pressing Next twice.

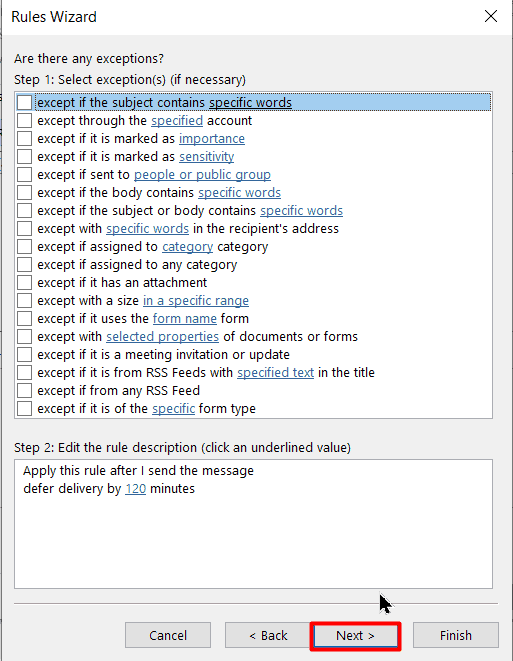

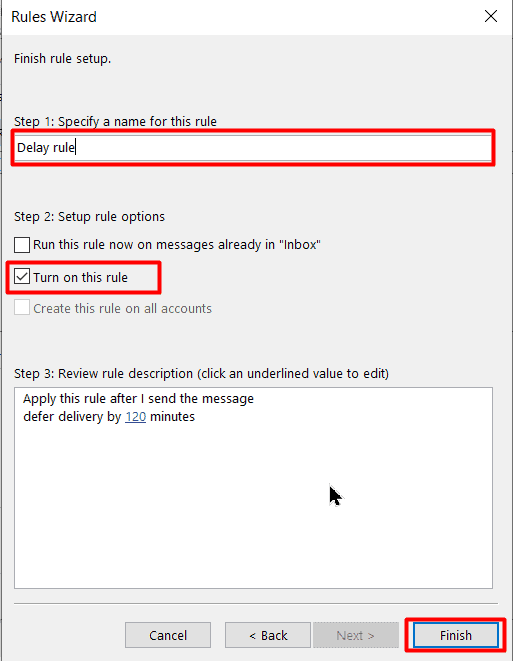
- Set a name for this rule in the Specify a Name for this rule box and check the Turn on this Rule option. Finally, click on Finish to apply this rule.


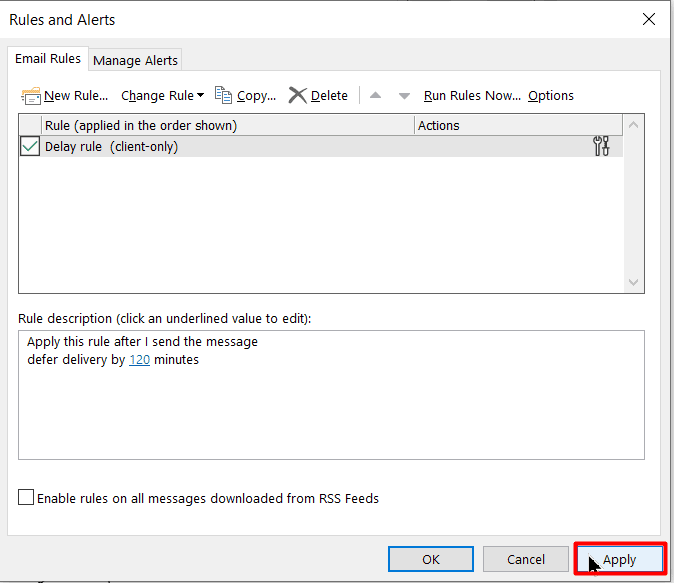

Hereafter, all your mails will be delayed by the specified number of minutes, after you hit the Send button.
Things to Keep in Mind
Although the delay feature in Outlook is fairly reliable, it can malfunction sometimes. To avoid it, please take care of the following things.
- It is advisable to keep your PC/ device switched on during the delivery.
- Your device should be connected to the internet during the scheduled time.
- Your PC/ Device’s date and time data are synced properly.
- Use the web version to avoid these issues.
Closing Thoughts
That’s all folks. In this short guide, we saw how to schedule an email in Outlook. I also showed you how to delay all emails in Outlook by a preset time. I recommend you experiment with these settings and send test mails, before sending official mails. This way, you’ll avoid the common pitfalls and be more familiar with the concept.
Please visit our free resources center for more information and helpful guides.
To learn Word with Simon Sez IT. Take a look at the Word courses we have available.

