Formatting Calendar View in Project 2010
Synopsis: In this article we look at how to format Calendar View in Project 2010.
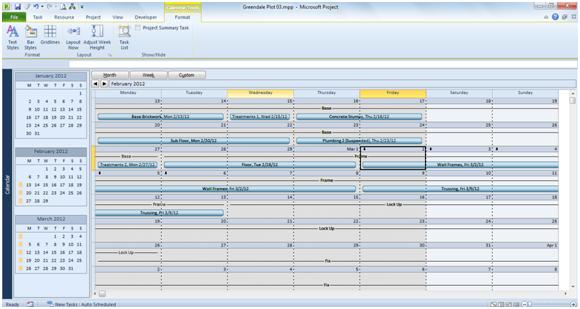
Calendar View in Project 2010 resembles the equivalent view in MS Outlook in many ways. Here is an example using the default setup.
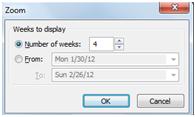
The user can choose between Month or Week views. In this case Month has been selected and the view shows 4 weeks that include most of Feb 2012. To show more or less weeks, click on Custom.
Use the spin buttons (or just edit in the text box) to increase the number of weeks from 4 to 6. Click OK.
It is now possible to see 6 weeks in view and all of February 2012. Switch to Week view by clicking Week.
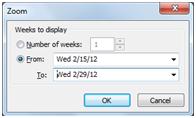
This time we’ll customize the view by showing the last half of February 2012. ClickCustom. Use the lower section of this dialog to set the date range to Feb 15 2012 to Feb 29 2012
Click OK.
The full weeks that include the specified range of dates are now shown.
To maximize the use of space, select the Format tab. The ribbon contents should look like this.
Click Adjust Week Height. The view now shows a much longer time period.
Summary tasks are not shown by default in Calendar View. To view them, click Bar Styles and you will see the Bar Style dialog.
Select Summary in the list of task types and then Line for the Bar type. Leave the color as black and the dialog now looks like this.
Click OK.
The summary tasks are now shown as lines with text embedded in them. Where multiple tasks appear on the same day you will see a small black arrow in the top left corner of the day. Notice the one on Mar 2 2012.
Click on the arrow and a list of the tasks scheduled for that day appears, as shown here.
Although you can’t change the formatting of individual entries, you can change styles as with other graphical views in Project 2010. The leftmost command on the Format tab is Text Styles. Click that and the Text Styles dialog appears. You can choose an entry from the Item to Change dropdown list and format its text as required. You can change font, font size and color, etc.
When you have made any changes, click OK to confirm them.
Similarly, you can use the Bar Styles command that we have already seen to change the way that any of the specified items appear in Calendar View.
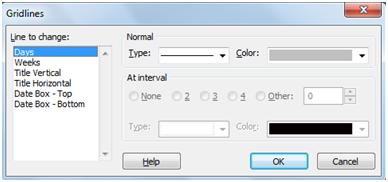
Another feature that can help when customizing Calendar View is the Gridlines command. Select this and the Gridlines dialog appears.
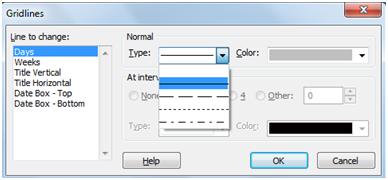
Let’s change the line between Days. Select Days as the Line to change and then click the dropdown arrow next to Type.
Select the bottom (dash dot) type and a color of black and click OK.
Calendar View now looks like this.
And finally, you can easily change which fields are shown in each bar using the Bar Styles dialog. Click Bar Styles on the Format tab. Select Critical as the Task Type. Now click the dropdown arrow next to Field(s).
You are offered a full list of the available fields that can be shown in the bar. Select the ones you want to show by using the check boxes. I’ve selected Start as well as Name. Click OK.
Now the bar for each critical task includes both the task name and the start date.


