How to Create Tasks in Microsoft Project 2016
During this article, we’ll demonstrate how to add a task using Microsoft Project. In this particular section we are going to start a project wedding plan.
Now, many people’s ideas of what might be part of the arrangement for a wedding will be different. We are going to try to include enough detail to be reasonably realistic, but will also reflect different needs of weddings in various parts of the world.
How exactly you set up this project and other like this may not reflect how you might set about doing them, but will instead assist you in gaining experience with the tools involved.
Getting Started
We have already made a list of the major aspects of this wedding plan. We may or may not expand on this list, but we’ll start adding each of these to our main project plan.


Creating a Task
Note that we are in the Gantt Chart view. If you are not in the Gantt Chart view, you can enable this in the View tab.
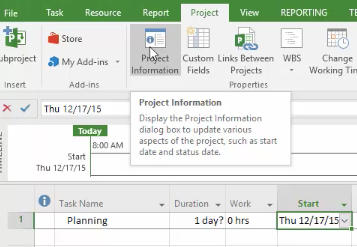
Let’s start with Planning. We have created a new Blank Project and in the task name we enter Planning. Once you press the tab key, you will notice that a number of fields filled in for the first task automatically.
By default, each task has a duration of 1 day with a question mark (1day?). The question mark indicates an estimate. It’s a good idea to leave each task as an estimate until you actually know a reasonably reliable duration. At this stage we are going to focus on getting tasks in and not the duration.


Adjusting Column Widths
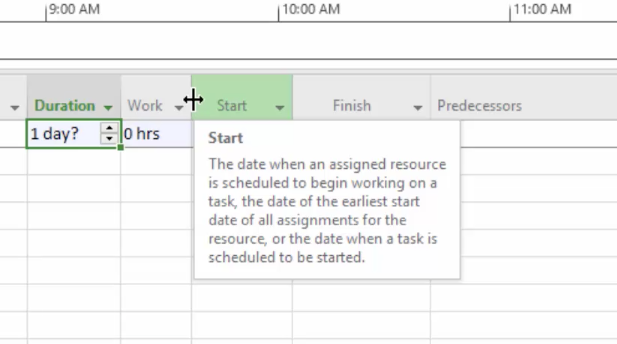
Now, as you’re just starting to set your project detail you might not want to look at these fields. You can make these columns wider or narrower by hovering over the header or gray area and move your cursor to the line between two fields, you will see your cursor change to a double arrow. Simply click with the mouse and drag one way or another to adjust the column width.


If you hover your cursor over the vertical divider in the middle of your workspace a slightly different arrow will appear that will allow you to see more or less of the task list or timeline.
Start and Finish Date
Let’s go back to this Start date. By default new tasks are set to the start of the Project or today’s date. You can check which one yours is set to by going to Project Options in the Schedule.
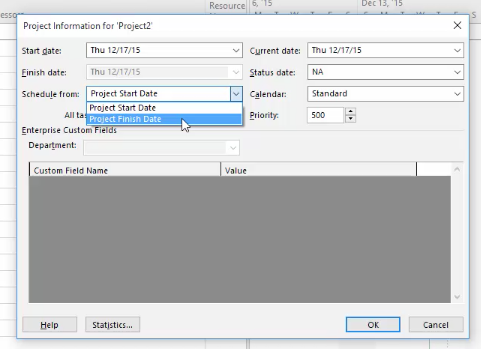
If you click on the Project tab in the ribbon, in the Properties group, the first button is Project Information. You will notice that one of the most basic pieces of information in a project is the Start Date and Finish Date.


You can see here that the default is scheduling from the Project Start Date. In some cases, we may want to schedule from the Project Finish Date. It is pretty often that you start a project and know when you want to begin, but it is also common to begin a project knowing what day you want to be finished by.
You can use either of these in Project 2016, but it is very important to know which one you are using as you start forming the details of your project.


Get 18-hours of Microsoft Project 2016 video training course. Click here to learn more. >>


