How to Setup Payroll Items in QuickBooks 2018
Are you considering moving your payroll process to QuickBooks? Whether you are getting ready for your first employee or transitioning your organization, you’re taking on a complex set of tasks that require accuracy and precision. Whatever your goals may be, you will be rewarded with constant access to your payroll data and complete control over your transactions and compensation records.
Payroll Items
Once you have signed up for QuickBook’s services, you can begin setting up your payroll. One of the very first things you will need to set up is Payroll Items.
Payrolls items are the things that you need to add or deduct from your employee’s paycheck. You’ll want to set up all of your payroll items before you set up your employees. That way you can pull those payroll items directly into their setup screen.
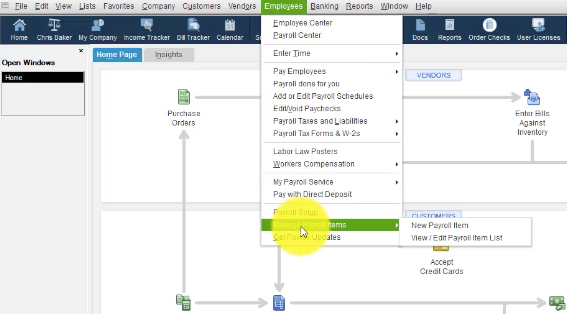
There is no icon on the home screen for payroll items, so you’ll need to access through the menu. Go up to Employees and select Manage Payroll items. Here you will be able to create, view, or edit a payroll item.


For our example today we’re going to go ahead and add dental insurance. No matter what kind of payroll item you need to add, the process will be the same.
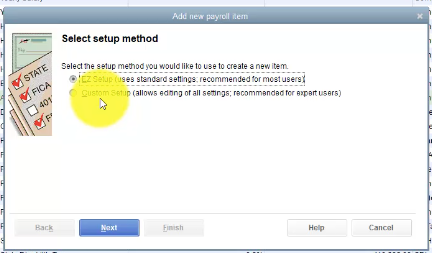
Right-click anywhere on this screen and select New. When you are adding a Payroll Item you will have the option to use Easy Setup or Custom. Let’s walk through how each of these work.


Easy Setup
The first thing the EZ Setup will ask you is what type of payroll item you are getting ready to create. Our example is an Insurance Benefit. The following setup screens will be customized based on this first answer.
Need to master QuickBooks? We offer 10 courses for QuickBooks. Click here to learn more.
The next stage of the setup will ask us to specify what kinds of insurance benefits we provide for our employees. We will select Dental Insurance. We will also specify how dental insurance is paid (employee, company, both).
Once you have answer personalized questions about your payroll item, QuickBooks will ask you about the payee/vendor. This is the person who the check is made payable to. If you don’t see your vendor on your vendor list you will have to set that up.
You will also be asked the account number and payment frequency. This is typically the account that you make payments to. If you don’t need a payment schedule you can skip this question for now.
When you select Finish, you will see your newly created Payroll Item in your Payroll Items list.


Custom Setup
You can see that our Payroll Item was automatically listed as a company contribution, but we need it listed as a deduction. So we’ll want to go through and edit this.
Right-click and Edit this payroll item. You will notice that when we manually edit this payroll item, we are brought into the more complex setup option instead of the easy setup. Because we want more control over our payroll item listing, this is exactly what we want.
As we go through this list you’ll notice that they have health insurance payable but not dental insurance, so we’ll have to set that up manually. To complete the manual set up, you will go through each of these options and customize your payroll item to fit your need.
Get the complete online course for QuickBooks 2018. Click here to learn more. >>

