How to Embed a Video in PowerPoint? 4 Easy Steps
(Note: This tutorial on how to embed a video in PowerPoint is suitable for PowerPoint 2013 and later versions including Office 365)
Imagine this: You diligently worked on an important PowerPoint presentation, paying attention to all the tiny details. To make it more interesting, you try to embed a video inside the PowerPoint.
But, to your dismay, something goes wrong. Either, the video is not getting embedded or it does not play during the slide show.
This is very embarrassing, isn’t it?
That’s why we have made this foolproof guide on how to embed a video in Powerpoint. After, following this, you can rest assured that all your PowerPoint videos work correctly during the presentation.
You’ll learn:
- Step 1 – Insert a Video Stored Locally on Your PC
- Step 2 – Preview the Embedded or Linked Video
- Step 3 – Choose How to Play the Video During Slide Show
- Step 4 – Set Other Video Options
Step 1 – Insert a Video Stored Locally on Your PC
If your video is stored locally on your computer, you have two options to insert it into the PowerPoint presentation. You can either embed it inside the slides or simply link it with the PowerPoint file. Now, there are pros and cons to both methods. Let’s discuss them one by one.
How to Embed a Video in PowerPoint?
To embed a video locally stored on your computer, follow these steps.
- Open the PowePoint presentation in the Normal view.
- Click on the slide where you want to insert the video.
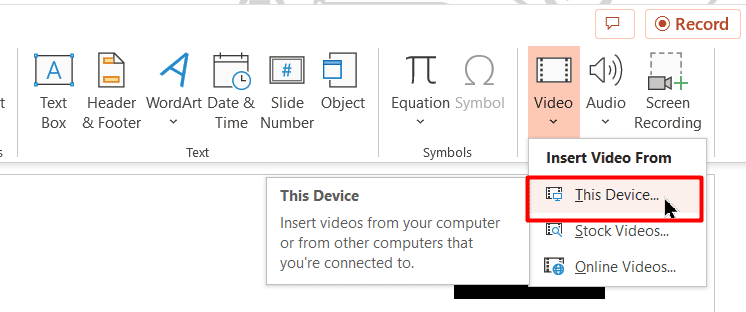
- Click on the This Device option under the Video section of the Insert tab. In some older versions, it may be referred to as ‘Videos on My PC‘.

- Locate and select the video you want to embed in the Insert Video dialog box.


- Click on the ‘Insert’ button.
- Adjust or resize the border size of the embedded video, if required. You can either use the mouse pointer to drag the borders or use the Size section in the Video Format tab to set custom Height and Width to your video.


This method allows you to permanently embed the video into the ppt file. This means you can share it with others without worrying about the video.
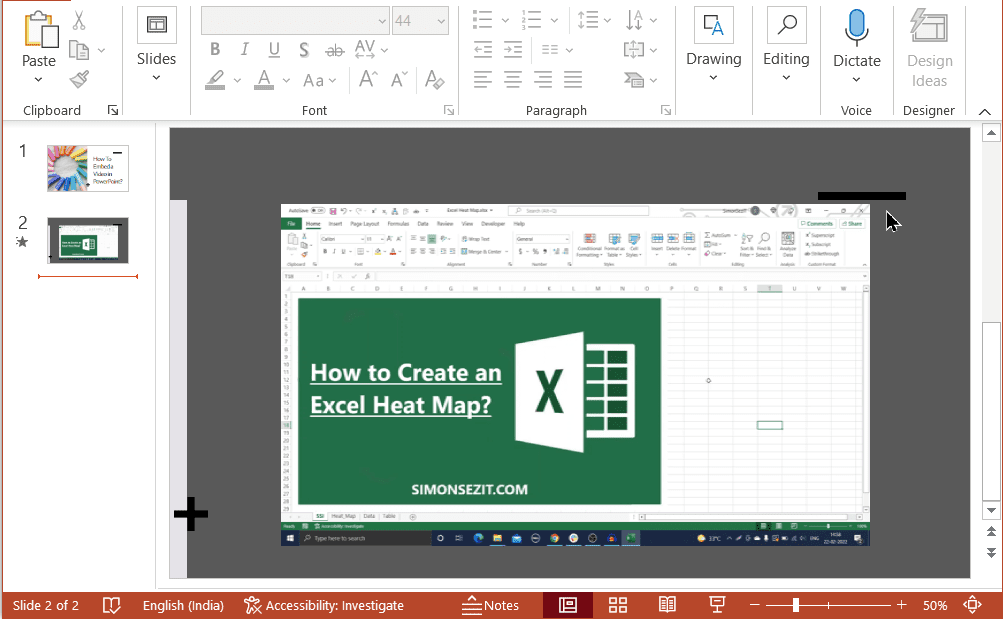

It will play anywhere or any device since it is part of the presentation. The only downside is that it will make the PowerPoint file heavy and bloated.
How to Link a Locally Stored Video in Powerpoint?
To link a locally stored video, follow these steps:
- Open the PowePoint presentation in the Normal view.
- Click on the slide where you want to insert the video.
- Click on the This Device option under the Video section of the Insert tab. In some older versions, it may be referred to as ‘Videos on My PC‘.
- Locate and select the video you want to embed in the Insert Video dialog box.
- Now, instead of clicking on the ‘Insert’ button, click on the arrow right next to it.
- Now, select the ‘Link to file’ option and click OK.
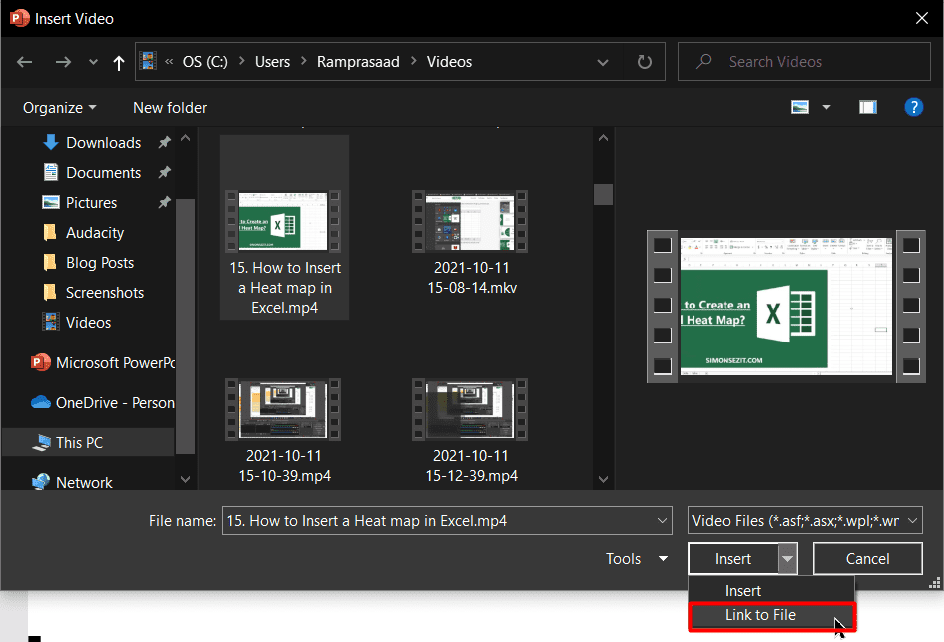

This method simply links the video file to the ppt, instead of embedding it. This means that the file will remain light and load quickly. But, with a drawback; you cannot share it with others over the internet. One more thing, if you accidentally move or delete the original video, it will no longer appear in the presentation.
That is why it is recommended to save the video file in the same folder as the presentation. Finally, you can resize the video as usual.
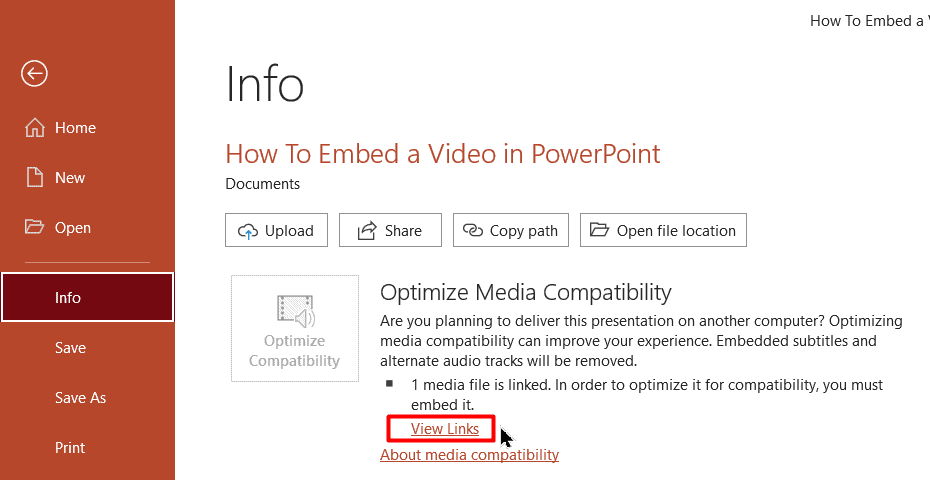
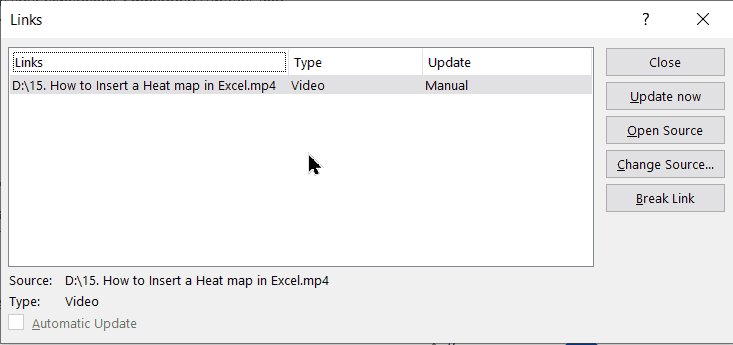
If you already have linked a video file and want to find its location do this :
- Go to the Info section of the File tab.
- Get all the media related details under the View Links button of the Optimize Media Capability section.


Step 2 – Preview the Embedded or Linked Video
It is important to preview any linked or embedded video and make sure that everything works alright, to avoid last-minute embarrassment.
To do this, go to the relevant slide and click on the embedded/linked video. If done correctly, a progress bar will appear just below the video with a Play button and volume controls.
Click on the Play button to ensure that the video plays properly.


Step 3 – Choose How to Play the Video During Slide Show
Now that we know how to embed a video in Powerpoint, let us see how to execute it perfectly.
Because you cannot be too careful, especially with videos. There is a lot of room for error and last-minute hiccups.
Normally, when you start the slide show and reach the slide with the video, it will not automatically play it. This is because, by default, the In Click Sequence option is enabled for Start options. This means the video will only play if you press the Enter, Space or Right arrow key.
You can change this by following these steps:
- Click on the frame of the attached video to see the Video tools tab.
- Under the Playback section of the Video tools tab, click on the Start option.
- Choose one of the three listed options:


- In Click Sequence (Default option): The video will be played if the user advances to the next step.
- Automatically: The video plays automatically, as soon as the slide is reached.
- When Clicked On: The video plays only when clicked on.
Step 4 – Set Other Video Options
We are almost at the end of this guide. But, before we wrap up, let us quickly see how to set up some related video options.
How to Play the Video in Full-Screen Mode?
By default, your video will be embedded into the pre-set border frame. When you run the slide show, it will be played inside this border.
But, you can make it play in full-screen mode by following these steps:
- Click on the frame of the attached video to see the Video tools tab
- Click on the checkbox next to the Play Fullscreen option under the Playback tab.


How to Hide, Loop and Rewind Embedded Videos?
In the same Video tools tab, you will see individual checkboxes to hide, loop and rewind videos. Toggle them on/off according to your preference.


Nearby, you will also see an Insert Captions option. Click on it and insert subtitles if required.


Closing Thoughts
That’s all folks. In this short guide, we saw how to embed a video in PowerPoint the easy way. We also discussed how to play the video during the slideshow and other related settings.
Explore these settings in a sample ppt file and let us know if you face any difficulties. We are always happy to help.
You can find more information and guides in our free resources center
Simon Sez IT has been teaching IT for over ten years. For a low, monthly fee you can get access to 100+ IT training courses.

