How to Navigate the Microsoft Project 2016 Workspace
Synopsis: In this how-to article, we’ll share insight into using workspace options in Microsoft Project 2016. Among the options we’ll cover, you’ll find these features to be some of the most common and easy to navigate: Project Templates, Quick Access Toolbar, standard Windows options, Entry Bar, Timeline, Main Project Window, Status Bar, View Controls and Backstage View.
Workspace Options
As a user of Microsoft Office 2016, you’ll benefit from a solid grasp of all the options available in Microsoft Project. Having a working knowledge of how these tools work enables you to create your project without a hitch. If you’ve been working on a project recently, the Start screen gives you an option to revert to your recent work. You also are given the option to open specific files versus recent files.
Templates
Over to the right-side of the Microsoft Project 2016 workspace, you’ll find various Office 2016 templates to get you started. If you want a blank starting point, you can choose Blank Project from among these preloaded templates. The New from Existing Project template enables you to use one of your existing projects as a starting point for a new project. If you have a list of tasks in an Excel worksheet, you can make that list your starting point by choosing the New from Excel Workbook template. If your project requires budgeting or cost planning, the Create a Budget template would likely be most useful.
If the template you seek is not on the list, you could search online for additional MS Office pro templates.


Master Microsoft Project 2016 the Easy Way – Get 9-Hours of Online Training by Simon Sez IT
Quick Access Toolbar and Windows Buttons
Depending on the type of your project, you’ll find that you’ll use some tools more often than others from the long list of options in Project Pro. The Quick Access Toolbar on the upper left-hand corner is a great tool that gives you the ability to save your most used tools for easier access.
On the upper right corner are the standard Windows buttons that enable you to get help (F1), minimize the screen, maximize the window or close it.
Entry Bar
Above the Ribbon you’ll see the project name or file name. In this particular project, the default name is Project1.
Below the Ribbon you’ll see the feature known as an Entry Bar. This is where you can enter and edit data (like task names) into the project.


Timeline
Tasks you’ve entered will be shown on the Timeline. You may set the Timeline to run over a certain period of time depending on the duration of your project.


Main Project Window
The Main Project Window shows a Gantt chart consisting of two parts: (1) the list of tasks, and (2) the chart itself. The chart is typically a pictorial representation of tasks in the project.
Status Bar and View Controls
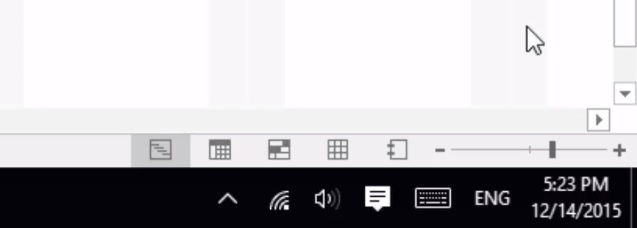
Across the bottom of the project window, you will find the Status Bar.
On the right-hand side are controls for viewing the project. With zoom controls, you can conveniently zoom in or out.


Backstage View
Backstage View of the Project server is where project administration takes place. The most common admin tasks used in Office 2016 are New, Save, Print and Share. Backstage View also is where the project information is set up.

