How to Pay Bills in QuickBooks 2018
Once you’ve learned how to create a bill in QuickBooks 2018, you’ll want to know how to pay your bills. Bills may come to your organization from various vendors, suppliers, and subcontractors. QuickBooks helps you keep track of these bills and pay them on time, quickly and efficiently.
Finding a Bill
You’ll want to avoid using the Write Checks window or the Check Register to type it in. If you have already created a bill and use either of these options, you’ll still have an open bill in your reports that doesn’t know there is an association between the two. Therefore, the bill will remain outstanding.
To pay your bill, follow the flow chart and go over to Pay Bills.


This is a listing of all the bills that you owe. There are several different ways to view this list. We are looking at all our bills owed, but you can also show bills due before a certain due date.
You can also filter this list by all vendors or by a specific vendor of your choice. We’re going to choose All Vendors and sort the list by Vendor, which is helpful in grouping like bills together.


Pay a Bill
To pay a bill, scroll down your list and check it off. Notice that when you check the bill the program will assume that you are paying the expense in full. If you have communicated with your vendor and they have specified that they are going to cover a portion of your bill – let’s set shipping and delivery expenses – you can change the amount to pay directly in the Amount to Pay section of the line.
Need to master QuickBooks? We offer 10 courses for QuickBooks. Click here to learn more.
Note: You cannot double click on your client/bill and have that bill automatically open from this screen. In the case that you want to view your bill, you will select the Go To Bill option at the bottom of your screen, if you want to look at it or make a change.
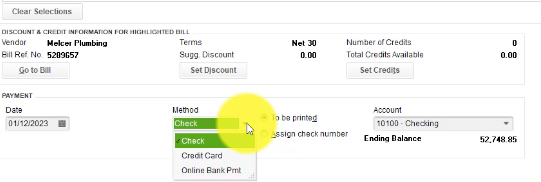
At the bottom of the screen you can specify payment details. For example, if the vendor gave you the terms of 2% 10 net 30, you can enter the amount that your taking under discount. If your vendor has issued you a credit you can also enter that here.
You will also enter the Date and Method of your payment.


Print or Assign
If you leave your bill on To be printed, you can continue with selecting bills to pay and pay as many as you want. When you are finished, you can print all of your bills all at once.
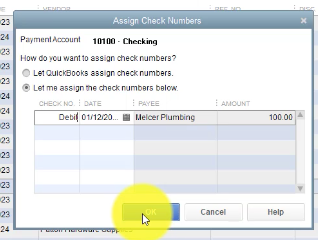
If you choose Assign Check Number, it will bring up a dialogue box to ask you what the check number is. Here, you can write whatever information you want. If you paid with Debit and enter Debit, that is what’s going to show in the register field.


Select Okay to pay the bill. From here you can continue paying more bills or select Done to finish.
Congratulations! You have paid your first bill in QuickBooks 2018.
Get the complete online course for QuickBooks 2018. Click here to learn more. >>

