Using Adjustment Layers in Photoshop Elements 11
Synopsis: In this article we look at adjustment layers in PSE 11. They provide a flexible and powerful approach to experimenting with color and tone.
If you need to apply an adjustment to an image you can apply it using an adjustment layer rather than applying it directly to the image.
There are several advantages to using adjustment layers compared to applying adjustments directly:
• To modify an adjustment you only need to double click the relevant layer and then modify the adjustment settings on the layer
• To reduce the effect of an adjustment you can lower the adjustment layer’s opacity
• Adjustments of different types can be stacked and you can experiment with each adjustment separately
• You can confine the effect of each adjustment to just part of an image by using a layer mask.
To create an adjustment layer when editing an image in PSE 11 Editor you can use either the button “Create new fill or adjustment layer” at the top of the Layers panel or you can click on the Layer menu then hover over the “New Adjustment Layer” option. You will see a fly-out menu showing the available adjustment layer types.


Select the type of adjustment layer you need. In this example I have chosen “Photo Filter”. You will then see a dialog like this one.


You need to make selections in the dialog:
• The name given to the layer depends on the type you have chosen. You can change this name if you want to.
• If you check the box “Use Previous Layer to Create Clipping Mask” then PSE 11 groups your adjustment layer with the layer immediately below it to create a clipping mask.
• The drop down labelled Mode lets you select the blending mode.
• The opacity control lets you adjust the opacity of the effect either by typing in the required percentage or by using the slider that you see if you click on the drop down arrow.
When you have made your selections, click on OK and the adjustment layer will be created.


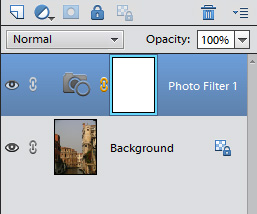
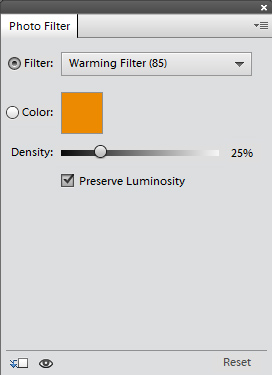
Having created the layer, to access the relevant controls you can double click the leftmost thumbnail (the one with the camera icon) and a dialog will appear. In the case of the Photo Filter adjustment I chose the dialog looks like this.


Here I can choose the filter to use from the drop down, I can select the color and set the density. I can also specify whether to preserve luminosity. For other types of adjustment there will be different controls and settings.
When experimenting with the effect of an adjustment layer, you can temporarily remove its effect altogether by making the layer invisible. You can also try changing the blending mode and opacity. You can change the order of adjustment layers to achieve different effects.
Having created an adjustment layer you can either leave it as a separate layer or you can merge it with one or more layers below (subject to a couple of conditions). If you merge it, the effects of the adjustment are permanently applied in the merged layer.


