Manually Manage Stacks in Photoshop Elements 10
Synopsis: In this article we look at how we can improve the organization of images by using stacks, and how to manage stacks manually.
It’s very often the case that you have multiple similar images of a single subject, or perhaps of similar subjects. When you have a large catalog of images overall this can greatly increase the time it takes to locate specific subjects or images as there are so many to look through. Using stacks can help. Similar images are grouped into stacks – either automatically or manually – and when you are looking for a subject or image you first find the stack, and then look through the stack to find the image or images that you want.
Let’s first look at how to create a stack.
The first four images shown here are not really very similar, but they were taken at the same location, and I may want to stack them to reflect that. When stacking manually the images do not actually need to be similar in any way.


To stack the four images, select them first. As they are consecutive, select the first one and then hold down the Shift key while you select the fourth one. You can see that they are selected by the light gray frame that appears.


Select the Edit menu and then hover over Stack.


There are two options available. We’ll look at the option to stack automatically at another time. To manually stack the photos using the ones you’ve already selected click Stack Selected Photos.
The images are stacked and two icons appear.
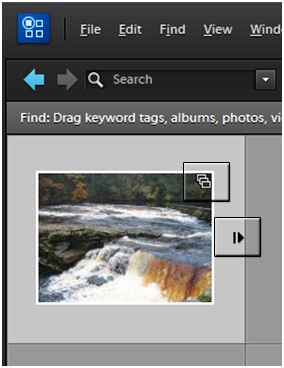

The first selected image is selected as the top image in the stack, and that’s the one you can still see. In its top right you can see an icon like a stack of papers (marked as 1 above). This indicates that it is the top image in a stack.
There is also an arrow icon at the right of the stack (marked as 2 above). Click that and the stack is expanded.


Once expanded, the stack still exists, but now you can see all of the images separately. There is an arrow to the right of the last image that points leftwards. Click that to collapse the stack again.
Tip: Using those two arrow icons is the quickest way to expand or collapse the photos in the stack.
When you have a stack or one of its images selected, if you click on the Edit menu and hover over Stack you will see several more options available.
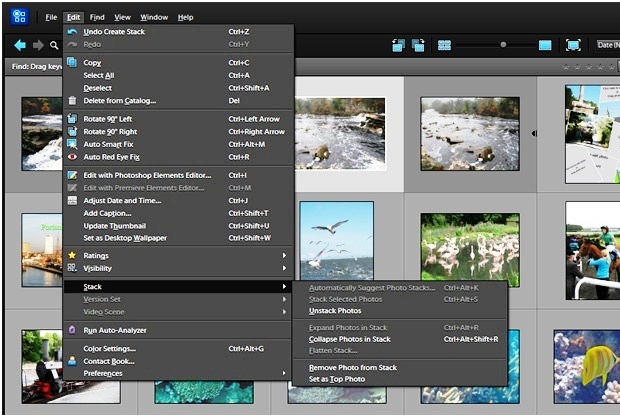

• Selecting Unstack Photoswill cause each of the images to be returned to its original location in the Media Browser and the stack itself will no longer exist.
• If you have one or more specific images selected, the command Remove Photo from Stack will remove it or them from the stack.
• If you have a single image selected, selecting Set as Top Photo will make that image the top one in the stack.
One other important option appears if you have just the top image in the stack selected.
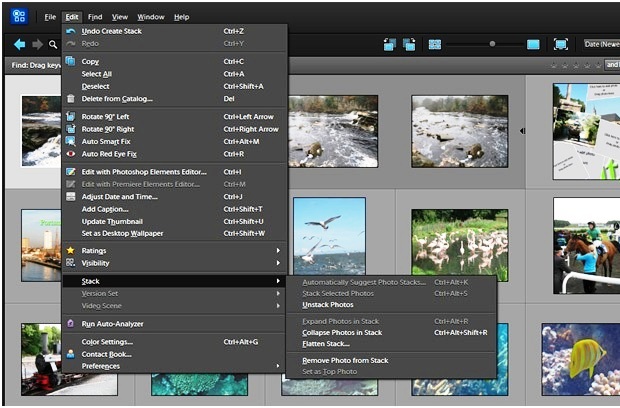

The option Flatten Stack…causes all but the top photo to be deleted. If you select this option you see this dialog.
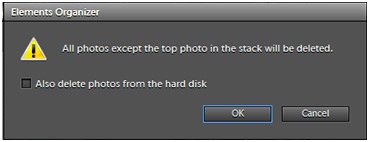

Click OK to confirm the operation to flatten the stack and delete all photos in the stack except the top one. Click Cancel if you don’t want to flatten the stack. There is also a check box that you can use to indicate that you want the photos deleted from your hard disk as well.


