Using the Lasso Tools in Photoshop Elements 10
Synopsis: In this article we look at when and how to use the various lasso tools in Photoshop Elements 10.
Photoshop Elements 10 includes a number of selection tools, and it’s sometimes difficult to choose the best one for the job, particularly if you’re just getting started with PSE 10.
The lasso tools are used primarily for selecting irregular shapes. There are 3 lasso tools, and each is particularly good in specific situations.
• The Magnetic Lasso is best used where you need to select along an irregular edge where there are definite color or tonal variations.
• The Polygonal Lasso works well where the area to be selected includes straight lines.
• The regular Lasso Tool is then used in more general cases.
The lasso tools are found together in the Tools Panel in the PSE 10 Editor as shown here.


Note that all three lasso tools are accessed from the same button. To access the fly-out menu either left click and hold on the button or right click on the button.
Let’s start with the regular Lasso Tool.
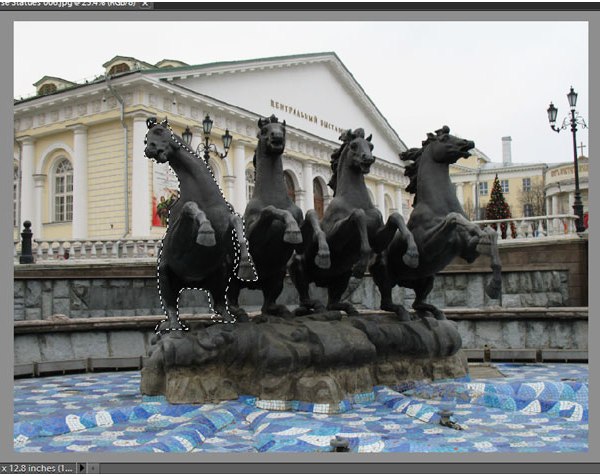
With this tool you can select any irregular shape. It can be quite tricky to use, but you should find that it becomes easier with practice. Let’s select the leftmost horse in the statue in the photo above.
First, select the Lasso Tool. When you now move over the image to start the selection, you will see that the cursor shape has changed to a lasso. This reminds you which tool you are using.
You need to draw carefully around the shape, which can take time and patience, particularly with a big shape. It’s good to practice on smaller images first. To draw, position the cursor where you want to start, click with the left mouse button and draw.
Tip: To maintain your selection in case you need to release the mouse button before you’ve finished drawing, press and hold the Alt key down.
I’ve drawn around the first horse, and this is what it looks like now.


The success of the selection will depend on how accurately you can draw around the area you want to select. Don’t be afraid to start again if it goes wrong, and if you are rather inaccurate, one approach is to include too much in your selection then take the extra parts off as a separate exercise later.
Now let’s use the Polygonal Lasso. This is best used where the selection can be made up of straight lines. This is a photo of a warning sign on a well-known Australian beach. Let’s select the sign, with the intention of cutting it out later.


Select the Polygonal Lasso Tool. Start at one corner of the image with a single click. Then click further points around the image – particularly at corners – so that straight line segments are created. You click back at the original starting point to join up the open ends or double click to close the selection with one final straight line.
Here you can see the results of my selection.


Finally, let’s try the Magnetic Lasso Tool. This tool detects differences in color and tonal values near the points where you are drawing with the tool, and it snaps to these points of difference. It can be used to make very irregular selections, although it’s best to use it where the selection reflects definite differences in tone or color.
Let’s try selecting this sea lion.


Select the Magnetic Lasso Tool and then drag around the edge of the sea lion. As the tonal and color differences are sharp – particularly against the sea – the tool makes a good job of detecting the sea lion’s body and the selection is good.


So, when using the lasso tools, the trick is to choose the right one for the job and to get plenty of practice.


